Player Path Tool: Difference between revisions
(Created page with "== Introduction == The player path tool is a simple tool to create multiples lines with various points, giving a visual aid for creating levels, helping the visualization of...") |
No edit summary |
||
| (4 intermediate revisions by the same user not shown) | |||
| Line 5: | Line 5: | ||
== How to use it == | == How to use it == | ||
Drag the Player Path Tool into your scene. The prefab is located in 'Assets/LevelKit/Tools/PlayerPathTool.prefab'. | |||
The player Path Tool has automatically created a new path called PlayerPath_0: | |||
[[File:PPT NewPath.png|thumb|left]] | |||
== | == LOCK YOU TOOL == | ||
'''PLEASE NOTE:''' When the Player Path Tool is unlocked it will create a Path Point any time that you click in the scene view - which can unintentionally create a mess of path points in your scenes! Remember to use the Lock button whenever you are not using the Player Path Tool. | |||
[[File:PPT Lock.png|thumb|left]] | |||
== Creating Points == | |||
Clicking in scene will create points (if the tool is Unlocked). To visualise the Path you have created, make sure Full Path is Visible is Enabled in the inspector. There are various other visibility settings here you can change. Selecting a point will show you it's number in the sequence. | |||
[[File:PPT APath.png|thumb|left|A path in scene]] | |||
Once points are created they will populate in the Paths dropdown. | |||
[[File:PPT points.png|thumb|left|PPT points]] | |||
Lower in the Editor open the dropdown called '''Path Details''' See image. Here you can type in text - useful for making gameplay notes or leaving messages for your team. For example "Door interaction here" or "Guard Patrol" etc. | |||
[[File:PPT Text.png|thumb|left|PPT - Text]] | |||
These notes will populate in scene. See image. | |||
== Add New Path == | |||
You can have multiple paths in scene, this is useful for blocking out different puzzles, planning player routes, figuring out guard patrols etc. | |||
Latest revision as of 13:42, 27 March 2024
Introduction
The player path tool is a simple tool to create multiples lines with various points, giving a visual aid for creating levels, helping the visualization of the possible paths that the player can go through the level.
How to use it
Drag the Player Path Tool into your scene. The prefab is located in 'Assets/LevelKit/Tools/PlayerPathTool.prefab'.
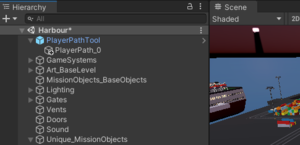
The player Path Tool has automatically created a new path called PlayerPath_0:
LOCK YOU TOOL
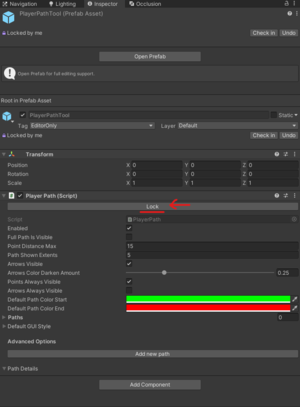
PLEASE NOTE: When the Player Path Tool is unlocked it will create a Path Point any time that you click in the scene view - which can unintentionally create a mess of path points in your scenes! Remember to use the Lock button whenever you are not using the Player Path Tool.
Creating Points
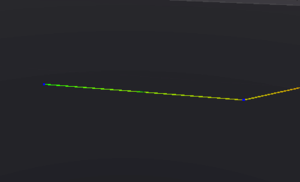
Clicking in scene will create points (if the tool is Unlocked). To visualise the Path you have created, make sure Full Path is Visible is Enabled in the inspector. There are various other visibility settings here you can change. Selecting a point will show you it's number in the sequence.
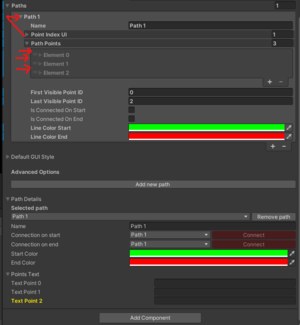
Once points are created they will populate in the Paths dropdown.
Lower in the Editor open the dropdown called Path Details See image. Here you can type in text - useful for making gameplay notes or leaving messages for your team. For example "Door interaction here" or "Guard Patrol" etc.
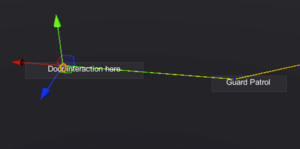
These notes will populate in scene. See image.
Add New Path
You can have multiple paths in scene, this is useful for blocking out different puzzles, planning player routes, figuring out guard patrols etc.